Website Style Guide
Commonwealth University Strategic Communications and Marketing has outlined a website style guide for producing and formatting content on the commonwealthu.edu website.
Website Style Guide Index
The Website Style Guide provides guidelines for developing content across the commonwealthu.edu website.
When writing content for the web, please keep these in mind:
- Write clearly – Content should be written in active voice and include terminology that is widely know to members of our community and beyond.
- Keep it simple – Content should not be complex, but easy to follow along and understand from an outside perspective.
- Organize content – Content should be well written, organized, and consistent across all web pages on the website.
- Use images where appropriate – Images help visually complement written content. Use images as appropriate, but too many may lessen the user experience. The gallery feature can be utilized if several photos are needed for display. Be mindful to show equitable representation of campus locations where possible.
- Include a 'call-to-action (CTA)' when possible – A CTA is an action that the user can take based on the information within the page. Examples include registration/application, contact forms, related websites, contact information, payments, etc.
- Be inclusive to all locations – All CU centric content should use terminology, images, and definitions inclusive to all CU students at Bloomsburg, Lock Haven, Mansfield, and Clearfield.
Creating content for web sections is just the beginning. The real challenge lies in keeping it fresh and relevant. Here are some simple strategies to ensure your web pages stay up to date:
- Timeless Content Creation – Aim for content that remains relevant over time, known as "evergreen" content. Instead of specifying a particular year or time frame, opt for wording like "recently" to maintain relevance longer.
- Prioritize Important Updates – Evaluate whether time-sensitive content, like lists of officers for a given year, is crucial for your audience. Consider whether you're willing to update it regularly. If not, consider excluding it.
- Stay on Top of News – If you have a news page or feed feature included on the webpage, ensure there's enough content to keep it updated frequently. Determine if updates will be manual or automatic to keep the page fresh.
- Refresh Prominent Content – Regularly update prominent elements like landing page photos. Remember to phase out photos of individuals who are no longer associated with your organization. Also, keep in mind that what's "new" loses its freshness over time, so review and update language describing recent developments accordingly.
Please follow this general guidance to provide users with a consistent experience across the website:
- Semester – Use the terms fall semester, spring semester, summer session, in lowercase.
- Dates/Time – Spell out all days of the week, unless spacing is limited. In such rare cases, please use only these abbreviations:
- Sun. - Mon. - Tues. - Wed. - Thurs. - Fri. - Sat.
- Months – Spell out all months, unless spacing is limited. In such rare cases, please use only these abbreviations:
- Jan. - Feb. - March - April - May. - June - July - Aug. - Sept. - Oct. - Nov. - Dec.
General Guidance
- For Office Hours and Event time listings, utilize p.m. and a.m. instead of PM and AM
- Distinguish between times before and after midday:
- Use "a.m." for "ante meridiem" or "before midday."
- Use "p.m." for "post meridiem" or "after midday."
Program and degree naming should be consistent across all programs and degrees at Commonwealth University.
Academic Degrees
Academic degrees are capitalized only when the full name of the degree is used, such as Bachelor of Arts or Master of Science. General references, such as bachelor’s, master’s, or doctoral degree, are not capitalized.
- Use an apostrophe (possessive) with bachelor’s degree and master’s degree, but not in Bachelor of Arts or Master of Science.
- Do not use an apostrophe with associate degree or doctoral degree.
Degree Types
When referring to the degree types, use periods in between the letters:
Undergraduate Degrees
- Associate of Applied Science (A.A.S.)
- Associate of Science in Nursing (A.S.N.)
- Bachelor of Arts (B.A.)
- Bachelor of Arts + Master of Science (Accelerated) (B.A. + M.S.)
- Bachelor of Applied Science (B.A.S.)
- Bachelor of Fine Arts (B.F.A.)
- Bachelor of Music (B.M.)
- Bachelor of Science (B.S.)
- Bachelor of Science in Business Administration (B.S.B.A.)
- Bachelor of Science in Education (B.S.Ed.)
- Bachelor of Science in Nursing (B.S.N.)
- Bachelor of Social Work (B.S.W.)
Advanced Degrees
- Doctor of Audiology (Au.D.)
- Doctor of Nursing Practice (D.N.P.)
- Master of Accountancy (M.Acc.)
- Master of Business Administration (M.B.A.)
- Master of Education (M.Ed.)
- Master of Education + Certificate (M.Ed + Certificate)
- Master of Health Science (M.H.S.)
- Master of Science (M.S.)
- Master of Science in Nursing (M.S.N.)
- Master of Social Work (M.S.W.)
Non-Degree
- Certificate
- Concentration
- Endorsement
- Minor
General Degree
- Associate degree (not possessive)
- Bachelor's degree/baccalaureate degree/Bachelor of Arts degree/B.A. degree
- Master's degree/Master of Science degree/M.S. degree
- Doctoral degree/doctorate/Doctor of Education degree/Ed.D. degree
Web and Drupal Standards
Drupal is our Content Management System (CMS). CU currently partners with a strategic website support partner, OHO Interactive. The Strategic Communications and Marketing team works with them to plan enhancements and deploy various updates to keep our CMS running smoothly.
Our hosting partner is Acquia. The CU website which is managed using the Drupal CMS is hosted in the cloud with Acquia.
Most users will have access to four templates available on website. Templates and their use are largely dependent upon assigned permissions and intended use. Several templates are exclusive to members of the Strategic Communications and Marketing team. Many of the website features on our site are available across the various templates.
These are the templates available to most web users:
- General page – large majority of pages throughout the site are general pages.
- Event – for campus events. Most roles able to use.
- Office – detailed office information templates.
- Profile – a page to provide a profile or bio, along with contact info, for faculty or staff.
These are the templates available to members of Strategic Communications and Marketing:
- Landing page – reserved for top level pages only.
- Examples: Academics, Admissions, Cost & Aid, Campus Life
- News – for timely news releases.
- Process Flow – Used to break down a complex process into simple step by step directions.
- Example: Transfer Student Application Process
- Program – Academic program details
- Webform – forms for users to fill out personal information
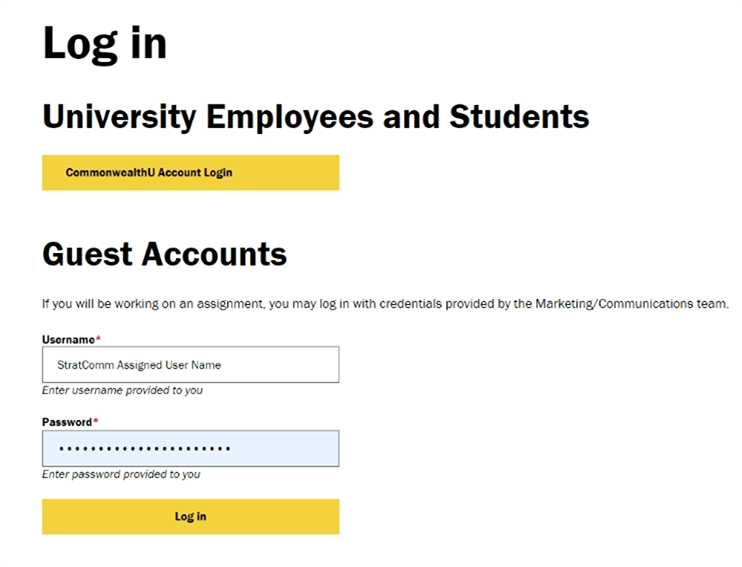
Users that are trained on the Drupal CMS can access the login page via this link.
Anyone with single-sign on (SSO) credentials (employees and students), can use the first gold button underneath the heading of "University Employees and Students" to login. Google Chrome is the recommended browser but all popular browsers (Edge, Firefox, Safari, etc.) can be used to access.
Hyperlinking directs a user to another webpage (e.g. CU Help Desk website). The URL will show up blue on the backend but the CU color on the frontend.
Links to other pages within the CU website should open in the same tab. Links to an external website should open in a new tab. If the link directs to a media file (e.g. image or document/pdf), then the link should open to a new tab.
It is best practice to hyperlink related text within a sentence rather than including the full URL within the text.
- Incorrect – Visit the CU Help Desk https://helpdesk.commonwealthu.edu/TDClient/66/Portal/Home/ for more info.
- Correct – Visit the CU Help Desk website for more information.
If adding a button as a link, the button text should be formatted as below:
Linking Examples
Button Examples
This button goes to a CU PageThis button goes to an external pageThis button goes to a media file
Center Button Examples
This button goes to a CU PageThis button goes to an external pageThis button goes to a media file
Best Practice for Image Resizing and Naming Conventions
Always resize images before attempting to upload. Naming files that lead with the sizing dimension first will allow you to easily search and locate appropriate image options that are available for a specific web feature.
Name resized image with:
- Size first
- Dashes between words
- Preference lowercase words
- No spaces between words and avoid odd characters like $, #, !, etc.
- 255-character max, but much shorter is highly recommended
Examples
- 260x300-bashar-hanna.jpg
- 1900x924-cu-mascots.jpg
- 560x600-lockhaven-winter.jpg
Uploading images
- Once your photo is correctly sized and named, click Add Media.
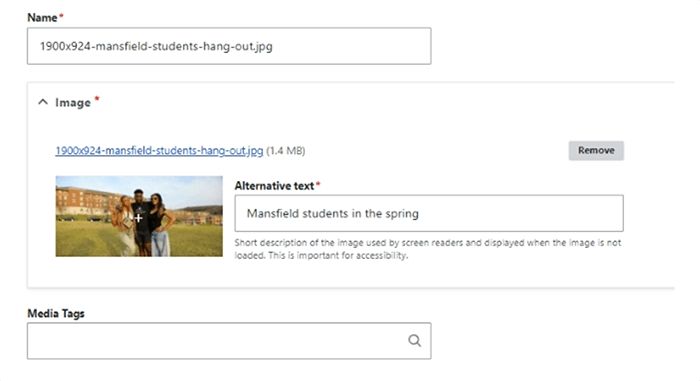
- Browse – find your file on your computer to upload it. Once you select it, you should be prompted with a new window that will allow you to browse and select your photo. It is very important to make sure to include appropriate Alternative Text. See guidelines below.
Upload Several Photos through the Media Bulk Uploader
- At the main menu, mouse over Content > Media Bulk Uploader. To select an individual file, mouse over Content > Media > Add Media. Select File/ Image.
- Provide a name, navigate to your file, under Browse.
- Once you selected your photo, you should see a thumbnail view of your file.
- Add Alt text (see guidelines below).
Using Alt Text for Images
When uploading, alt text must be added. Its primary use is for accessibility and allowing visitors with visual impairments to understand the content of the webpage, even if they can’t see the image. This is essential for visitors using screen readers, as well as users on slow connections to glean meaning from image content.
- If applying alt text to a profile picture, put the person’s name. If it’s a general photo, describe what is happening in the image (i.e., Students studying in the Andruss Library)
- Alt text has the bonus of being searchable, enhancing SEO (keywords can be used)
- Think about what a visitor would type in as a search, that can help you determine Alt text to use. Context for how a photo is used on the page can also be considered. The same image used elsewhere on the site may have different alt text if the context is different.
- No need to say “Image of” or “picture of” as that is understood, but you can indicate if it is a painting, illustration or logo.
- As a rule of thumb: avoid writing text alternatives longer than 100 characters. Having long alt text will result in a poor user experience for those using screen readers. If the image requires a lengthier description, it is better to describe the image in the content and provide a shorter alt text.
Examples of good, okay and bad Alt text:
- Good – Six students are sitting in a classroom as the professor conducts a lesson.
- Okay – Students and a professor
- Bad – Class
- Unacceptable – Not including alt text
More Info on Alt Text Best Practices from Siteimprove
Sizing Hero Images
Hero images are large optional images appearing at the top of a page intended to help highlight an area.
The following hero image sizes are what should be used for the various pages across the CU site:
- Events – 960px x 640px
- General – 1900px x 924px
- Office – 1160px x 640px
- Program – 1900px x 924px
Crop images to the appropriate dimensions by utilizing graphic design tools such as Adobe Photoshop or Canva.
Adding Photo to Page
Once photo has been added to the Media library, you can add it to your page using the tool bar using the insert image option.
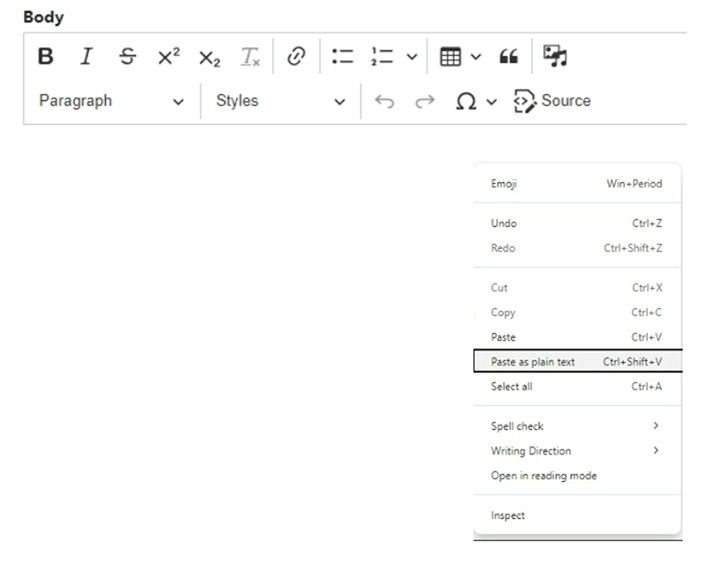
To avoid extraneous code from coming over when copying content from other sources, it is important to bring over that content as Plain Text. Not utilizing the plain text option can result in content that renders with odd formatting that is not consistent with our approved websites styles.
When using copy/paste from other sources, such as Word, copy the text and then in Drupal, go to the content editor, right click and choose the “Paste as plain text” option as illustrated below. If you do not follow this guidance, you may have inadvertently copied code over from a source document that will interfere with our site styles.
Within the Drupal tool bar, you can select two forms of listing items:
- Bulleted – Square red bullet points, which would be used the majority of the time. These are automatically formatted when you select bullet list formatting.
- Numbered – Used for listing out steps or instructions on a web page.
Example of a Bulleted List
- Item 1
- Sub item 1
- Sub item 2
- Item 2
- Item 3
Example of a Numbered List
- Item 1
- Sub item 1
- Item 2
- Item 3
Heading levels play a huge role in page accessibility and must be appropriately used.
When structuring a page think organization and structure when it comes to headings. Screen reader users can navigate a page according to heading levels. They must be used correctly and not be applied to simply make text look larger! This is key for adding content within the Body section of pages.
Heading Structure Awareness
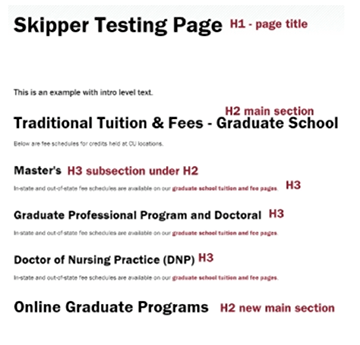
- Heading 1 or H1 is automatically added for page titles. There is only one Heading 1 for any given page. Once you type your page title at the top of your new page, that will be the title that displays on your published page. No additional H1 levels are to be added to your page and are removed as a option from the formatting option in the editor.
- The next heading level to follow for main sections on a page would be a Heading 2 (which is slightly smaller but larger than the Heading 3 format option)
- If there are subheadings under Heading 2, those would be Heading 3 levels.
- After subsections, go back out to a new main section using a Heading 2.
- Headings must be placed in correct order. H1, H2, H3 – after an H3 you can go back to an H2 if you’re starting another main section on the page.
Examples of incorrect heading applications:
- H1 (page title) – then H3 – that would skip H2 entirely.
- H2 – then H4 – that skips H3 entirely.
Sample of correct heading structure:
Web Updating Tutorials
How to Upload Documents
- In the menu bar, hover over Content and click Media
- Click the blue +Add media button
- Click > Document
- Add a name that is concise and describes the document
- Consistent naming conventions consistent for ease of finding them later. For example, if you are uploading documents for Health Services at Lock Haven, have all the file names start with "Health Services - Lock Haven - " i.e. "Health Services - Lock Haven - Meningitis Vaccine".
- Click Choose File to select the file from your computer
- You can add a short description to describe what information the document contains
- Click Save
- The page will refresh back to the media manager.
- Add a name that is concise and describes the document
- If there are additional documents to upload, click on the blue +Add media button and repeat the above steps.
How to Create Links to Documents
- Navigate to the page where you want to add a link to the document and click on the Edit button.
- Add your text content where you want to add the document link and then select/highlight the word(s) that will be used as the link.
- Click the link icon in the editor menu.
- Start typing the name you used when you uploaded the document. A list of matching pages and media files should begin to pop-up.
- Click on the file name of the document you want to link to. Drupal will add something that looks like “/media/29XXX” into the Link URL box. This is the actual file location within Drupal which will be used to create the link.
- You can add a title to describe the document
- Documents such and PDFs, Word Docs, etc should be set to open in a new tab by clicking on Advanced and sliding the Open in new window slider so it is green.
- Click the green check mark to save.
- Repeat the above steps for any additional documents that need to be linked to.
Frequently Asked Questions
Once a page is marked as "Needs Review," the web team will receive an email notifying them that you have made changes on the page that you wish to have reviewed. Review and publishing of webpages will typically occur within two business days, but in a few instances may extend several days and potentially up to a week depending upon the volume of requests and time of the year.
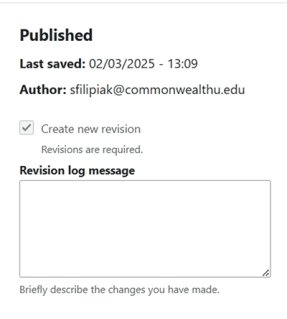
To facilitate the publishing of your changes, it is a good idea to include a descriptive note in the "Revision log message" area so that when you save the page on the "Needs Review" status, it will be included in your update request to the web team. If you have updates requiring immediate attention, please add the word "URGENT" to the edit log message so the web team can prioritize your request.
Strategic Communications and Marketing maintains sole ownership over important high traffic pages including but not limited to the homepage, all main program pages, and academic college pages in order to ensure they are optimized for recruitment efforts.
Editing rights are generally not extended to these areas, but users are encouraged to review them regularly and reach out to the web team with ideas that might lead to improvements. Our website request form is readily available for users to communicate specific edits that might be beneficial for any page.
Web users can be granted access to update webpages that they wish to maintain within their area, however there occasionally might be a need to create a brand new webpage for a new service, function, or initiative.
New webpage creation is limited to the Strategic Communications and Marketing web team. If you believe you are in need of a new webpage, please reach out to us through our website request form so we can work with you establish the new area or discuss alternative options/features that might be available to you through our web system. \
QR Codes
QR codes can be a useful tool for directing users to digital content quickly, but they should be used thoughtfully to enhance user experience. Here are some guidelines to help you determine when and where to use QR codes.
QR codes are best used when they provide a clear benefit to the user.
Consider using them when:
- Linking to mobile-friendly content – QR codes are primarily scanned on mobile devices, so ensure the destination page is optimized for mobile viewing.
- Providing quick access to event details – Direct users to event registrations, schedules, or venue maps without requiring them to type a long URL.
- Encouraging engagement in physical spaces – If your content is displayed in a printed format (posters, brochures, signage), QR codes allow users to quickly access digital resources.
- Connecting to multimedia content – Use QR codes to link to videos, virtual tours, or interactive experiences.
Avoid using QR codes when:
- The same action can be completed more easily with a direct hyperlink, especially for desktop users.
- Users are already on a mobile device and can simply click a link instead of scanning a code.
- The QR code is the only way to access important information—always provide an alternative.
- The code links to a non-mobile-friendly or difficult-to-navigate page.
The following list represents the best practices to be mindful of when working with QR codes.
- Use a QR code generator that will not require a premium subscription for users to access the link. We recommend the Adobe Express QR Code Generator.
- Use high contrast and proper sizing – Make sure the QR code is large enough to be scanned easily and stands out against the background. The QR code image must be full resolution and cannot be blurry or pixelated.
- Include a clear call to action – Explain why users should scan it (e.g., "Scan to register").
- Include a short URL in addition to the QR code so the user has options in accessing the information.
- Test before publishing – Ensure the QR code works and directs users to the intended page.

